** This post contains affiliate links. If you use these links to buy something I may earn a commission, at no extra cost to you. **
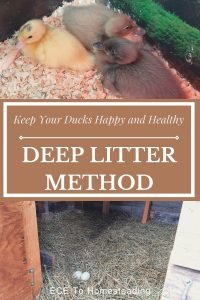
It all started with me wanting to get another puppy, our dog is almost 3. My husband said no. So I decided ducks were the next best thing. I wanted to get ducklings and raise them to love me and give me eggs while helping me with my garden by eating all the bad bugs. It only took a short conversation to convince him we NEEDED them.
I started researching the heck out of it, as I do with any new project, and decided Indian Runner Ducks were the best fit for our backyard. I searched online found several reputable duck breeders that would sex the ducklings before shipping to Canada. But then I learned the shipping of the ducks would not be possible during Covid-19 times.
The next step was to look locally and take my chances on how many male ducklings’ vs female as they are not sexed at small local farms. I reached out to several places that I had heard were selling ducklings, turns out I was a couple weeks too late as all those ones in the incubators were already spoken for.
After all that disappointment, incubating them myself would be the next best thing. I didn’t want to take the risk to wait and see if I could find more later in the season, or wait until next year.
Buy Incubator or Make One?
I looked up incubators… they are a bit on the expensive side for just wanting to hatch a couple ducklings. But if you plan to hatch more ducklings, or chicks, following years it may be worth it to buy one.
My friend suggested a DIY incubator from a Styrofoam cooler. Yes! It was a great idea. I love projects that I have to build and figure things out. It turned out to be quite the science experiment.
Temperature and Humidity
Ducks need to be kept at 37-38 (37.5 ideally) degrees with humidity around 65%. My house is heated by a wood burning airtight, so when it’s warm out we don’t have a fire and the temperature fluctuates a lot with in 24 hrs. It took me about a week of trying out different things – lightbulb wattage, more holes, less holes, more containers of water, less water…. The list goes on. So this is what I have found to be the best choices for me.
Every house will have a different humidity level. Even though you live in the same climate, your neighbours’ house may have slightly different humidity levels than you. Things like lots of indoor plants and fish tanks can affect your indoor humidity.
It is important that along with the levels you keep track of the air sac within the egg. It will grow as weeks go by. If it is not growing your humidity is too high and if it’s growing too much your humidity is too low. If you are not confident in your tracking of the air sac you can also weigh the eggs. They need to lose 13-15% of their starting weight by the time you put them into lockdown.

Making The Incubator
1. Gather Supplies
- Styrofoam cooler
- I tried a small one that I got from the vets office, it’s thicker but much smaller. I couldn’t keep the temperature and humidity anywhere near where they needed to be. Regular cooler from Walmart or Canadian tire worked well
- Thermometer and Hygrometer (or wet bulb)
- I used one that was from my reptiles as well as a digital one to compare temperatures on each side of the incubator.
- Rubber mesh shelf liner
- Got it from the dollar store
- Lightbulb socket that plugs into an extension cord
- Found one at the hardware store in the lightbulb section
- Extension cord
- Glass container with water
- I used 2 small mason jars
- Sponges
- They will go into the water to keep the humidity higher, if needed.
- Dollar store, or old, picture frame that can be taken apart
- Just need the glass from it for the window
- Duct tape
- Knife
- White School glue
2. Make a Viewing Window
Using the glass from the picture frame, trace the rectangle on the front of the cooler. Cut out the rectangle slightly smaller than what you drew and tape the glass over the hole.
3. Install Light Socket
Trace the bigger end of the socket onto one of the ends of the cooler. Cut it out slightly smaller than the circle your drew. Push the socket into the hole you made. Use some glue to fill the gaps and secure it into place.
4. Air Flow
Ducklings get their oxygen from the air around the egg, so you need to ensure there is adequate air flow.
Using a pencil or screwdriver (or anything of similar size) poke a hole or two around where the socket is, and some on the other end of the cooler.
You want the air to flow through, not just in from one side.
5. Non Slip Flooring
Cut the rubber shelf mat to the size of the bottom of the cooler and place inside.
This will let the ducklings have something to grip when they hatch and are starting to try and walk.
6. Put in Light Bulb and Check Levels
Put the light bulb, thermometer and hygrometer into the incubator and start testing out your levels. Poke more holes if your temperature is too high, use tape to cover them up if its too low.
Make sure to check the levels right at the top of the eggs. You can do this by placing the thermometer and hygrometer right at egg level, small ones can sit on the eggs. Have a look and see where on the thermometer it is taking the temperature from. Just because the thermometer is beside the eggs doesn’t mean the sensor is at the same level as the eggs.
Put a jar with water in for more humidity. I prefer glass jars to small plastic cups that some people use. The glass warms up and helps keep the temperature more consistent. I also used the jars to create a barrier to keep the ducklings away from the light bulb.
If the humidity is too low you can add another jar or add a sponge to the jar. As the water gets absorbed into the sponge it creates more surface area for the water to be evaporated. It also works well with a paper towel, I would just be sure to keep those away from the light bulb.
7. Placement of Incubator
Place the incubator into an area of the house where the temperature stays pretty consistent. You want to make sure it is away from drafts and heat/ air conditioning vents. I failed to do this and thus had major fluctuations in temperature.
Important Note
Make sure to check your thermometer and hygrometer to make sure they are the correct temperatures. I failed to do this assuming that a brand new one would be correct. My humidity was too low because both hygrometers were wrong.
To test them out you can place the hygrometer into a sealed ziplock with a container, or small dish, with a paste made from salt and water. You don’t want the salt to dissolve. Seal everything in the bag for 6 hours. The humidity should be at 75%. If yours reads different, either calibrate it or take note of how much its off.
Once you know that you are reading correct levels, you want to keep track for 24hrs before putting eggs in. Adjust accordingly.
Now that you have got your incubator up and running and the eggs are in there it is now time to be patient.
Alternatives
I’ve seen some people use a tin tray with wire mesh over top. It allows more air flow around the eggs. It seemed like unnecessary to me as lots of other people have successfully done it without that added step. If you feel like you want to Plating Freedom has a great tutorial on how to make one. They also have a nice trick using tin foil to create a barrier from the lightbulb as the temperature was getting too hot.
Add in a fan. Some people wire in old computer fans. This helps keep the air moving and circulating, keeping the air temperature constant throughout the whole space. Still air incubators will be colder at the bottom and hotter at the top. Our Half Acre Homestead has a great tutorial on adding in a dimmer switch and a fan.
Homestead SC made an incubator with an added fan and a thermostat. This will be require a lot less of your time continuously adjusting the temperature and humidity within the incubator.